
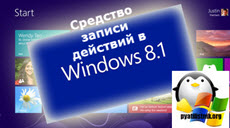
 Средство записи действий по воспроизведению неполадок в операционной системе Windows 8/8.1 — это новая функция, которая позволяет пользователям записывать свои действия в любом используемом приложении и предоставлять подробное представление действий со снимками экрана с соответствующими комментариями. При помощи этой функции можно записывать все действия, выполняемые на компьютере за указанный промежуток времени, включая текстовое описание диалогов, выполняемых щелчков мыши, а также изображений экрана для каждого щелчка (которые далее будут называться снимками экрана). По окончанию записи, действия можно сохранить в файл для того, чтобы специалисты, помогающие устранить проблему на компьютере, могли узнать обо всех действиях, выполняемых пользователем. Отчеты этого приложения также будут полезны для тех, кто помогает справиться с проблемами, которые находятся на форуме. Если автора тем будут прилагать архивы созданные средством записи действий по воспроизведению неполадок, то это может значительно помочь отвечающим.
 Windows 8/8.1 Средство записи действий по воспроизведению неполадок в операционной системе Windows 8/8.1 — это новая функция, которая позволяет пользователям записывать свои действия в любом используемом приложении и предоставлять подробное представление действий со снимками экрана с соответствующими комментариями. При помощи этой функции можно записывать все действия, выполняемые на компьютере за указанный промежуток времени, включая текстовое описание диалогов, выполняемых щелчков мыши, а также изображений экрана для каждого щелчка (которые далее будут называться снимками экрана). По окончанию записи, действия можно сохранить в файл для того, чтобы специалисты, помогающие устранить проблему на компьютере, могли узнать обо всех действиях, выполняемых пользователем. Отчеты этого приложения также будут полезны для тех, кто помогает справиться с проблемами, которые находятся на форуме. Если автора тем будут прилагать архивы созданные средством записи действий по воспроизведению неполадок, то это может значительно помочь отвечающим.
Средство записи действий по воспроизведению неполадок в операционной системе Windows 8/8.1 — это новая функция, которая позволяет пользователям записывать свои действия в любом используемом приложении и предоставлять подробное представление действий со снимками экрана с соответствующими комментариями. При помощи этой функции можно записывать все действия, выполняемые на компьютере за указанный промежуток времени, включая текстовое описание диалогов, выполняемых щелчков мыши, а также изображений экрана для каждого щелчка (которые далее будут называться снимками экрана). По окончанию записи, действия можно сохранить в файл для того, чтобы специалисты, помогающие устранить проблему на компьютере, могли узнать обо всех действиях, выполняемых пользователем. Отчеты этого приложения также будут полезны для тех, кто помогает справиться с проблемами, которые находятся на форуме. Если автора тем будут прилагать архивы созданные средством записи действий по воспроизведению неполадок, то это может значительно помочь отвечающим. News
Совсем недавно компания Google, к большому неудовольствию Microsoft, отказалась подождать лишнюю пару дней и опубликовала информацию относительно уязвимости в операционной системе Windows 8.1. В тот раз у Microsoft было заготовлено обновление, одна теперь история повторяется снова, и на сей раз уязвимость пока закрыть нечем.
Windows 7
Введение
Средство записи действий по воспроизведению неполадок в операционной системе Windows 7 — это новая функция, которая позволяет пользователям записывать свои действия в любом используемом приложении и предоставлять подробное представление действий со снимками экрана с соответствующими комментариями. При помощи этой функции можно записывать все действия, выполняемые на компьютере за указанный промежуток времени, включая текстовое описание диалогов, выполняемых щелчков мыши, а также изображений экрана для каждого щелчка (которые далее будут называться снимками экрана). По окончанию записи, действия можно сохранить в файл для того, чтобы специалисты, помогающие устранить проблему на компьютере, могли узнать обо всех действиях, выполняемых пользователем. Отчеты этого приложения также будут полезны для тех, кто помогает справиться с проблемами, которые находятся на форуме. Если автора тем будут прилагать архивы созданные средством записи действий по воспроизведению неполадок, то это может значительно помочь отвечающим. Windows 2008/2008 R2 ЧТобы вернуть возможность пользоваться ntbackup в Windows Server 2008 R2, нужно скопировать файлы из server 2003 или Windows XP
 ЧТобы вернуть возможность пользоваться ntbackup в Windows Server 2008 R2, нужно скопировать файлы из server 2003 или Windows XP
- C:Windows\System32\Ntbackup.exe
- C:Windows\System32\Ntmsapi.dll
- C:Windows\System32\Vssapi.dll
- C:Windows\Help\Ntbackup.chm
- C:Windows\Help\Ntbackup.hlp
Utilities

Хотел я потыкаться в Windows Server 2012 R2 и создал ВМ в VirtualBox. А установка падает с ошибкой 0x000000C4. Говорит, перезагрузи комп. Оказывается для счастья нужно выполнить команду в консольке:
"C:\Program Files\Oracle\VirtualBox\VBoxManage.exe" setextra data WinServ2012R2_ VBoxInternal/CPUM/CMPXCHG16B 1
Windows 7 Как известно, в Windows 7 не был включен привычный администратор net send. Это фигово. Но хотя бы есть утилита MSG. И есть psexec. Это всё поможет нам оповещать пользователей. Команда выглядит следующим образом для всех компов домена: psexec \\* msg * "Hello!" А для списка компов: psexec @\\имядомена\netlogon\list.txt msg * "Hello!" list.txt - файл со списком компов назначения. У MSG есть особенность - сообщение висит на экране секунд 30 и исчезает. Кто не успел увидеть, тот опоздал:)
Как известно, в Windows 7 не был включен привычный администратор net send. Это фигово. Но хотя бы есть утилита MSG. И есть psexec. Это всё поможет нам оповещать пользователей. Команда выглядит следующим образом для всех компов домена: psexec \\* msg * "Hello!" А для списка компов: psexec @\\имядомена\netlogon\list.txt msg * "Hello!" list.txt - файл со списком компов назначения. У MSG есть особенность - сообщение висит на экране секунд 30 и исчезает. Кто не успел увидеть, тот опоздал:) Utilities
Вопрос распространения ПО всегда актуален. Теперь он касается TightVNC. Можно просто прикрепить к политике msi-пакет. Но настройки придётся вносить отдельно: либо вручную, либо батником.
Вкратце - ниже. Создаем батник следующего содержания: net use O: \\%1\C$ copy vnc.msi O:\ /y copy vnc.reg O:\ /y
NetApp Для того чтобы посмотреть как на NetApp вывести список всех команд в консоли, нужно подключиться через консоль к контроллеру и выполнить
 Для того чтобы посмотреть как на NetApp вывести список всех команд в консоли, нужно подключиться через консоль к контроллеру и выполнить